Provisioning
The Provisioning tab allows the administrator to create provisioning files to be used for device configuration.
Provisioning files management can only be done for users that have the MAC address defined.
The files generated using the interface are saved in the folder defined inside the Accolades configuration file (/etc/accolades/configurare.ini), using the folderProvizionare parameter.
Interface
The interface for managing the provisioning files is displayed below.

Add / Edit a file
Accolades has two methods for creating new provisioning files:
- Creating new files using the interface;
- Uploading existing files.
Creating and editing files using the interface
To create a new file, the administrator must press the add button, from the bottom of the page.

To edit an existing file, the administrator must press the Edit button, displayed after clicking on the file name.

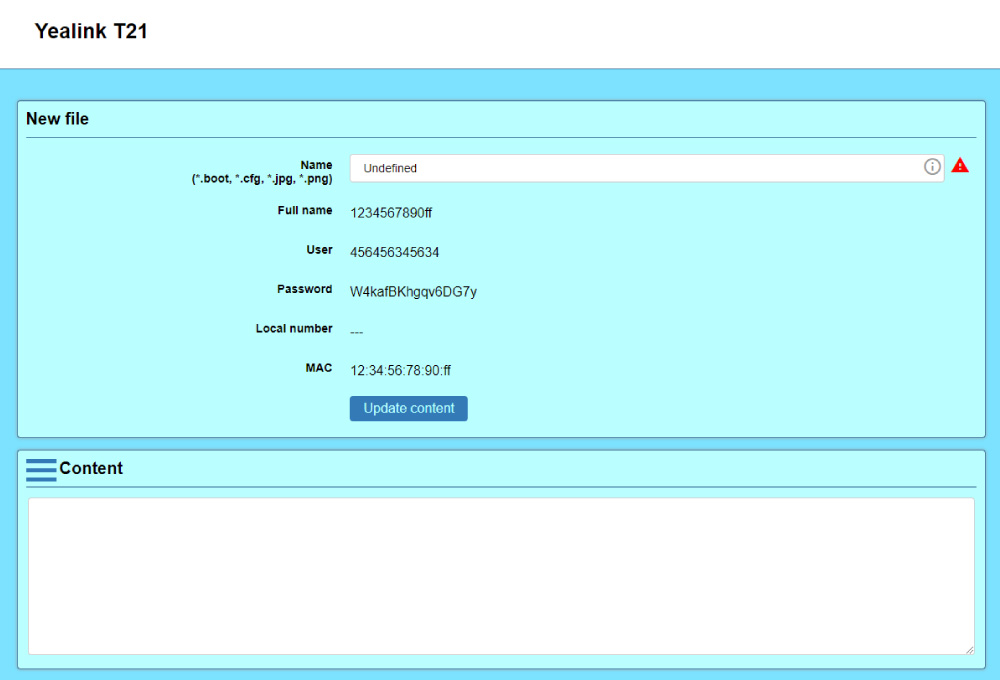
Accolades will display the interface for editing a provisioning file.

The interface is divided into two main sections: the file info panel and the content panel.
The file info panel contains the following properties:
- Name
- The name of the provisioning file, along with the extension.
- Full name
- The full name of the provisioning file, as it will be saved (all files have the MAC value as a prefix).
- User
- The username of the user for whom the file is created.
- Password
- The password of the user for whom the file is created.
- Local number
- The local number (interior) assigned to the user.
- MAC
- The MAC address of the device being used by the user.
- Update content
- The button is used when provisioning templates are used. Pressing the button will update the variables defined inside the template with the user values.
The Update content button will update any existing parameters inside the content with this user values. Because a template can contain parameters for more than one user (a phone with 2 lines, for example) Accolades will check the content for available paramters sets. Then it will ask the user to select the parameter set to be updated..

Last section allows the administrator to edit the content of the provisioning file. The user can load a template by pressing the Load template button, available inside the Content panel menu.
To submit / cancel the process, the corresponding button from the bottom of the page has to be pressed.
Uploading a file
The upload process can be started by pressing the upload button, displayed on the bottom of the page.

Accolades will display the provisioning file upload interface.

The interface contains the following options:
- Name
- The name of the provisioning file, along with the extension.
- Full name
- The full name of the provisioning file, as it will be saved (all files have the MAC value as a prefix).
- File
- The file being uploaded.
To submit / cancel the process, the corresponding button from the bottom of the page has to be pressed.
Delete a file
To delete an existing file, the administrator must press the Delete button, displayed after clicking on the file name.
